Showing posts with label Summer fun. Show all posts

Monday, 22 June 2015

Durham Region Feature: FUN Things To Do This Summer Part 2!

So, you've 'been there done that' to paintballing, you've found 1000 Geocaches and you've conquered your fear of heights at Treetop Eco Adventure Park...and it's only June. No fear, here are some more ideas of things you can do without leaving Durham Region! Enjoy :)

1.

Stand Up Paddleboarding

Want to keep up with the latest FUN fitness craze? This is it! Test out your balance (it's not hard, don't worry) with Port Perry SUP on Lake Scugog. Fun for the whole family!


2.

Goodwood Kartways

Got the need for speed? Then Goodwood Kartways is for you! Take the family or friends here to see who's fastest on the track! It's not often you can test how fast a vehicle can go, so take advantage of that here! 


3.

 Cedar Park Resort

Splash around in Bowmanville's Cedar Park Resort this summer with the kids! Not only do they have splash pads, water slides and pools, but also mini golf, camp ground, tennis courts and more. All you need for a fun-filled family day :)


4.

Pickering Playing Fields

You and your friends can't decide on an activity? Why not visit the Pickering Playing Fields that holds a variety of options: Mini Putt, Driving Range, Beach Volleyball and Batting Cages. Choose 1, 2 or all activities with your friends or family and enjoy the outdoors all day!

5.

 Pingle's Farm Market

There's stuff to do at Pingle's all year round! In the summer, there are wagon rides, a Barn Bouncer, visits with the farm animals, mini golf, giant board games and more. Best of all, all of this fun for only $5 per person! Check it out in the fall, too for an awesome corn maze!

6.

Bowmanville Zoo

Not only are there a lot of really cool animals at the Bowmanville Zoo, but there are also rides, a splash pad, and camels rides! Take the kids for an educational but fun day to the zoo where they can learn and play at the same time :) If you really want to splurge, you can book a private Big Cat encounter!

For more ideas of what to do this summer outside Durham Region, click here.

Missed Part 1? Click here

Monday, 25 May 2015

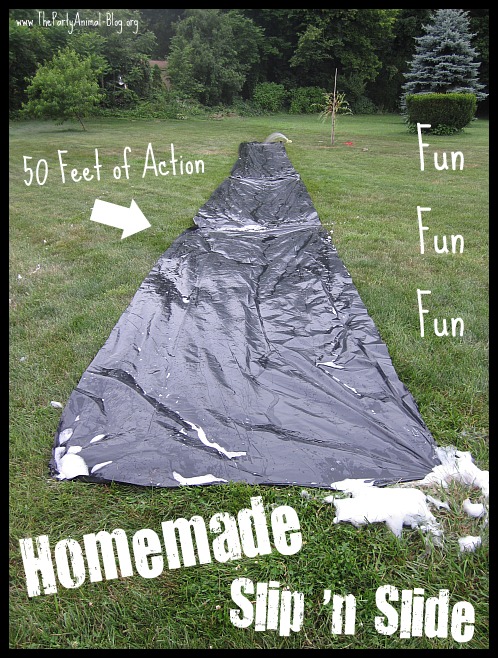
FUN for the Family: A Giant Homemade Slip 'n' Slide

50 Feet of Homemade Slip n Slide Fun

This post is not my own, as I copied it from http://www.thepartyanimal-blog.org/50-feet-homemade-slip-slide-fun/.
July 6, 2011 by .


Do your kids love the Slip n Slide, but have outgrown the ones you can buy in the store? If so not to worry because you can make a Homemade Slip n Slide that is fun for all ages.
My kids love Slip n Slides and we have had one almost every summer, BUT they are much bigger now and the store bought ones just do not cut it anymore.  So this year I promised I would make them one that would hold up and be extra long and this past 4th of July I kept that promise.
Creating this Homemade Slip n Slide was beyond EASY and it was also not too bad on the wallet either.  It may be a bit more money than the toys ones, but it is reusable and worth every cent spent. Major Summertime Fun right here !!
Check it out……


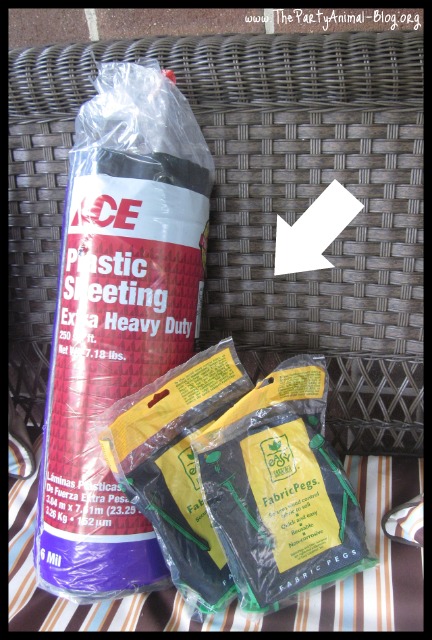
So here is what I used to make my Homemade Slip n Slide:
So I went to my local Ace Hardware Store and picked up a Roll of Extra Heavy Duty Plastic Sheeting. I chose the one that was 6 mil which is the thickness of the plastic – just by touch I knew this would be plenty and hold up well. My Roll was 10 ft x 25 ft and cost me $29.99. You can find this plastic is many sizes and lengths and will depend on how long and how wide you would want to make it.
I also picked up 2 packages of Fabric Pegs – which are just plastic pegs that would stick through the Slide and into the ground to hold it in place.
Now originally when I bought the Plastic Sheeting I was so excited that it would be double wide for 2 to go down it together and at the time I thought 25′ was long. Well when my hubby unrolled it onto the lawn 25′ did not look long at all – What was I thinking? So we fixed that by cutting it in half to make it 50′ Feet long and now we were back  in business.
So our Slip n Slide was 5′ wide by 50′ feet long – now that was awesome !!!
After we put the Plastic Sheeting on the lawn we then added some of the Fabric Pegs in where needed to hold it down. Then we got out the hose and wet down the entire slide and then placed it at the top so that it ran down the slide to keep it wet.
In addition to the water we added on some Dish Soap to make the Slip n Slide that much more fun and the kids got all cleaned at the same time – Double Bonus (lol) !! Just be sure to warn the kids so they do not get too much in their eyes.
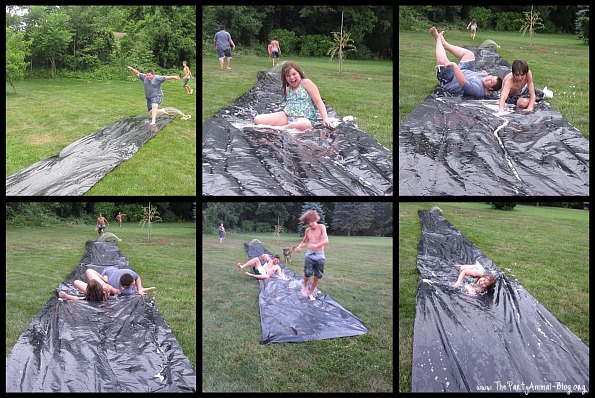
The kids all dipped in the Pool to wet themselves down first and then off they went. I am not sure which was more fun watching them slide down this thing like rockets or actually going down it – the kids would definitely say Going Down !!
 Here are some action shots and I am happy to report no major injuries – just some minor Bumps and Bruises, but none of them complained. They had sooo much fun with this and I have dried it off rolled it up and will take it back out for my daughter’s upcoming party.
So if your kids are too big for the other Slip n Slides – make your own, or make one anyway. It will last longer and you can make it to be any size you want, gotta love that !!
So at your next backyard Summer Party for the kids you will definitely have to try this !!

Thanks again to for the awesome idea and instructions!

Here's some tips: 
  • you can replace the dish soap with baby shampoo, to make it tear-free if you get it in your eyes.
  • let your imagination run wild and buy some cheap pool inflatables for the kids to slide on!